For particle size analysis, the test sieve remains a cost effective and precise measuring instrument for dry non-agglomerated particles. Test sieve analysis is widely used for quality control in many industries worldwide, the test sieve process is a simple and common practice to measure particles size and dry relatively free flowing materials. This here assumes the much important & necessary wet screening was performed earlier.
Particles size distribution data is then used to analyze material size.In principle, there are five basic elements of importance :
- test sieves
- test sieve shakers
- Sample materials and preparation
- Running the test
- Recording results and analysis
Test sieves
Test sieves should conform to current ASTM 11 or ISO 3310-1 Standards. Generally sieves are constructed of brass and stainless steel components, common diameters are 3 inches, 8 inches and 12 inches or metric equivalents, special diameters are also available tests sieves are available in three grades: compliance,inspection and calibration. compliant grade tests sieves are primarily used. The Sieves can also be examined to verify the openings and wire diameters of the mesh in order to ensure compliance to inspection or calibration grades, these examinations provide NIFT traceability.
Test sieve shakers
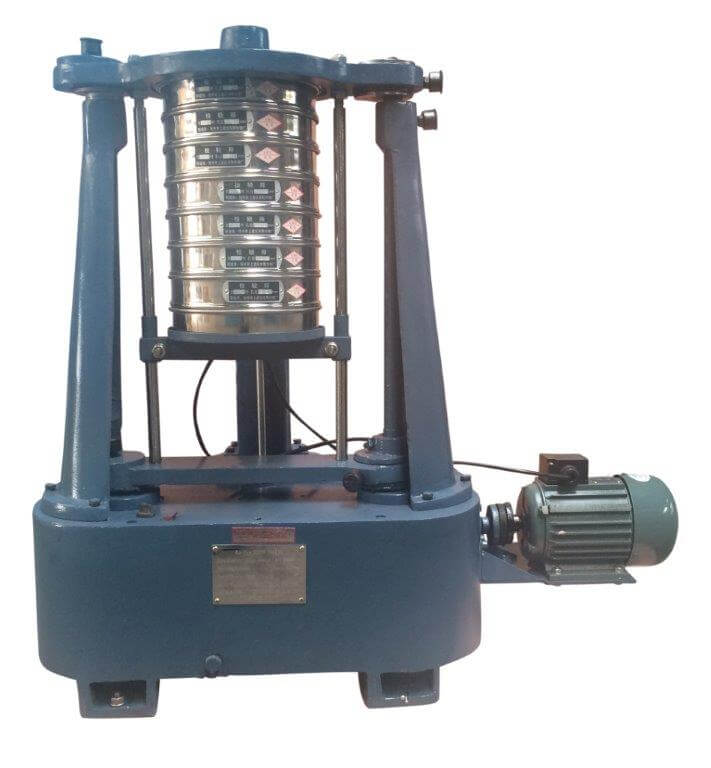
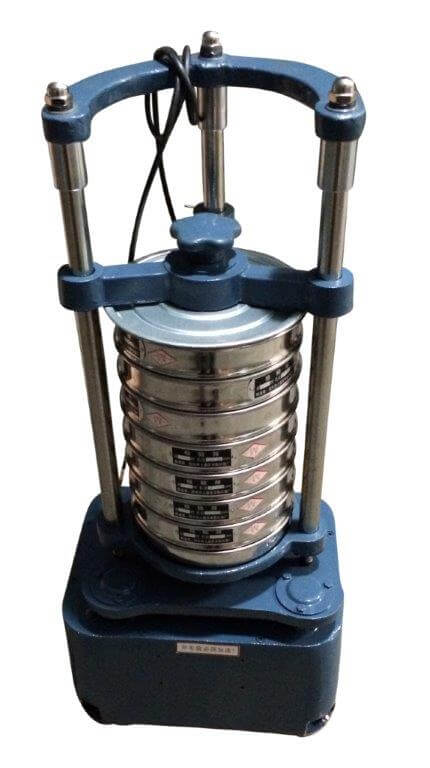
The Shakers must provide a consistent action that allows sample particles to effectively passed through the test sieves, the action may be tapping or non-tapping, vibratory or electromagnetic, there are no known calibration standards pertaining to Sieve Shakers.
sample materials and preparation – creating a representative material sample is critical there are various devices available to extract a sample from bulk materials and if necessary reduce the product to an optical Mass for size analysis, generally the sample mass is determined by the product specifications.
Running the sieve test
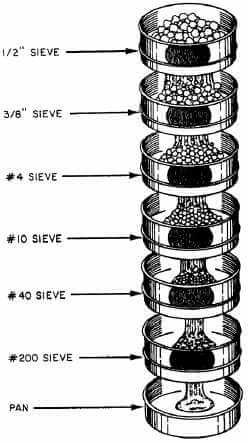
Particle size analysis can begin after a properly collected sample has been created. Select test sieves from The ASTM or ISO series with mesh aperture that reveal particle distribution at user defined critical sizes, these are usually stated in a product specification or determined by material processing requirements. Starting with the receiving Pan stack the sieves on top of each other with a fineness or small opening on the bottom of the stack and proceed in ascending order, used laboratory scale accurate to one-tenth gram to weigh an empty container, usually an extra receiving pan and established tear weight, weigh the entire sample and record the weight. WS Tyler offers sieving software for basic spreadsheet analysis, additional test information includes company name, test number and date. This may be saved and used as a permanent printed record, empty the entire sample into the top Sieve of the stack make sure that you do not overload any sieve as this may cause of blinding. place the stack into the sieve shaker with a cover on the top sieve and securely fastened the stack into the Shaker, sound enclosure cabinet can be used to reduce operating noise levels, set desired time limit and start The shaker. Again the time limit is generally an instruction included in the product specification, when the test is complete remove the stack of sieves from the Shaker, empty the sample material retained on the top sieve into the empty container while holding the sieve over the container gently brush the underside and inside of the Sieve to remove all remaining particles, weigh the contents in the pan and record data, repeat these Weighing steps for each sieve and bottom pan making sure to collect all particles, verify the new Total sample weight against the original mass sample weight, generally a difference of less than 1% is acceptable.
|
|
|
Recording results and Analysis
The final step in the Quality Control process is the analysis the ws Tyler sieving software will total the recorded weight, calculate cumulative weight retained and a cumulative percentage retained or passing for each test sieve, in the absence of a software program the same data must be recorded and then calculated the software will configure a particle size distribution curve for the records with the tests sieve now data collected and Analysis can be performed to begin your analysis compare the product specification requirements to your results the recorded data highlighted in yellow should be compared to corresponding requirements of the product specification sheet highlighted in blue to determine whether or not the size distribution of the sample material is acceptable.
Dry Screen Process Procedure
- Clean and inspect screen deck, high or low grade, for any holes or tears. Replace screens if necessary.
- Place clean pucks in each screen. Add the dried and cooled plus product to the top screen in the deck.
- Place prepared deck on the Ro-Tap or Sieve shaker for a minimum of 15 minutes.
- Build additional sieves into a primary screen deck if the P80 is suspected to be greater than 300 mesh.
- Screen the coarse sample through the primary screen deck first on the Ro-Tap.
- Add minus product from step 5 to the standard decks and proceed as in step 2.
Wet Screening
OK, this is now how I would do it, but it will communicate the concept of wet screening ultra-fines to wash them out before the dry screen process.
Wet sieving is the the separation of fines from the coarse portion of a sample while suspended in an aqueous solution introduced to a testing sieve. The liquid medium is used to negate static charges, break down agglomerates and lubricate near-size particles. After the fines have been washed through the sieve, the residue is oven-dried and re-weighed.
This step by step procedure is how to do a wet sieving wash:
- Clean and inspect the necessary screen for wet screening as indicated on the Sizing Work Order.
- Clean and prepare the filter pots with labeled filter paper.
- Wash weighed sample gently through required screen into a clean bucket, using cool tap water, gentle spray and your hands until water runs clean into bucket.
- Filter the plus product remaining in the screen.
- Place the filter paper in the oven to dry. Remove to cool.
- Filter and dry the minus product collected in the bucket
https://enginemechanics.tpub.com/14080/css/Sieve-Analysis-127.htm


