Of many physical parameters critical to design of grinding processes, impact of grinding media is among the most difficult to measure or predict. Yet impact of falling grinding balls, pebbles, or rods accomplishes the fine grinding essential to metallurgical recovery of most important minerals. Unfortunately, the same impacts that break ore fragments deform or crack grinding mill liners.
Impact Test Ball
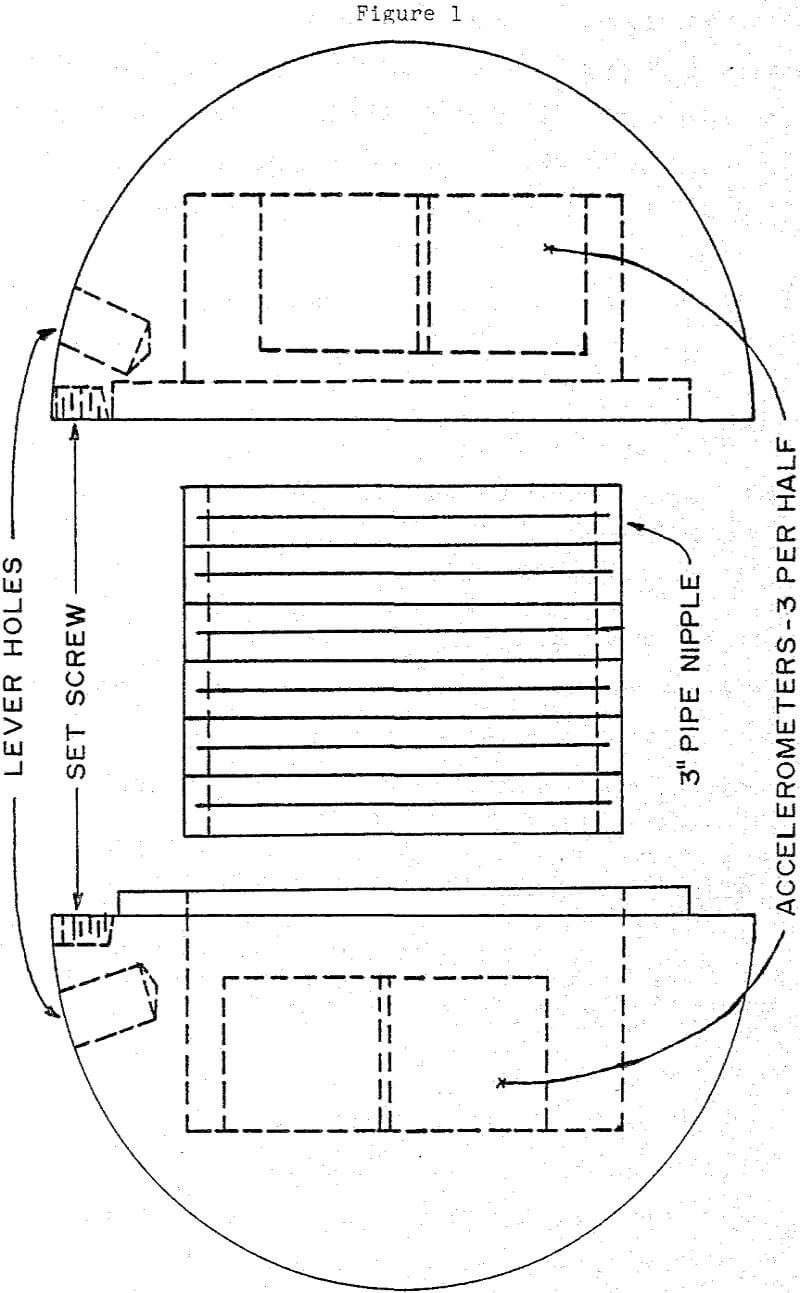
Design of an instrumented impact test ball for in-mill testing involved several considerations; survival of ball and instruments, retrieval of ball, maximizing generation of impact data, and fabrication of a ball capable of these ends.
Six “Protect-A-Pak” accelerometers were chosen to optimize data recovery per test, covering the expected impact range in reasonably small increments. Clusters of 3 units arranged in equilateral triangles in each ball half require a 72mm diameter cavity 51mm long. Geometry of the cavity requires a minimum sphere of 89mm to contain it and 10-15mm additional metal surrounding the compartment to provide strength. Final ball diameter was 140mm. The test ball must be substantially larger than standard 75mm balls in the Climax mills to be easily recovered and minimize chance of loss in the ball charge.
The ball was machined from alloy steel shafting and weighs 7.14kg with 6 accelerometers. Large grinding balls 89-127mm are common in larger mills and weight 2.9 – 8.4kg, a range which includes weight of the impact test ball.
Instrumented Ball Tests
Preliminary lab tests to determine range of decelerations and effect-of ore particle size were done before actual in-service tests.
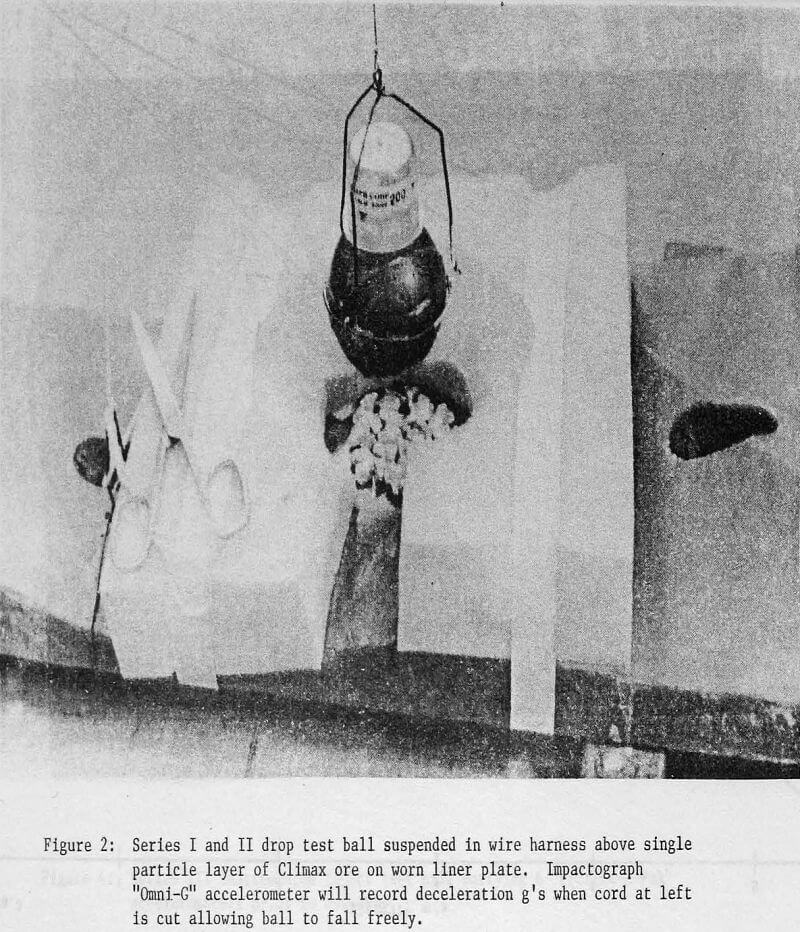
Series I drop tests used a 76mm alloy steel grinding ball at 63HRC surface hardness with “Protect-A-Pak” accelerometers of several ratings cemented to a flat ground on the ball. The test ball, suspended in a light wire harness, was dropped from gradually increased heights until the accelerometers responded in hitting a worn 100kg mill end liner of 20%Cr 2%Mo 1%Cu martensitic iron alloy.
Test Series II with same equipment but with the liner plate covered with a single-particle layer of sized Climax ball mill feed material (high-silica granite molybdenum sulfide ore, Bond Work Index 10.1-10.8) in Tyler screen sizes +100-65 mesh, +65-10 mesh, +10-3 mesh, +3 mesh-9.5mm, and greater than 9.5mm, were tested. A fresh layer of ore material was used for each drop. Larger, resettable Protect-A-Pak “Omni-G” accelerometers measured decelerations.
Factors Affecting Impact in Grinding Balls
Data from drop ball tests seem to be fairly well confirmed by in-mill tests with the hollow instrumented ball which, although heavier, is larger in diameter, less convex, softer steel, and strikes either the tumbling mass of ore and balls or descending mill liners. The ball was placed and recovered in the feed end of the mill where impact is known to be less severe.
Analysis of ball movement in mills of various size and speed can use these rather basic data to estimate relative impact severity in other mills.
Ball impact velocity depends on distance balls drop and horizontal component of peripheral velocity. These are easily calculated by physics formulas for circular motion.
Interpretations for Mill Operators
These drop ball and in-service impact test data, admittedly crude, give a first approximation and quantitative substance to observations mill operators have noted for many years.
More importantly, they show the disastrous potential for induced early liner failure that mill operation without ore, however brief, introduces.
The severe and often damaging contact stresses balls or rods exert on costly and critically important mill liners can be moderated to tolerable levels by several methods.


