Panning for gold is a simple operation but, at the same time, it is difficult to describe. Although the subtle techniques of gold panning vary with the individual and with the material being washed, the overall gold panning operation can be divided into six basic steps as follows:
How to Prepare for Panning
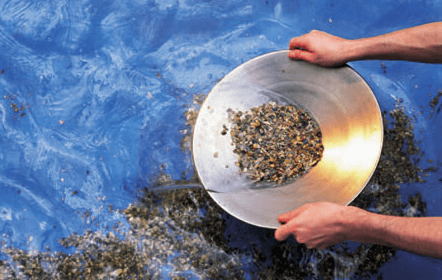
After filing the pan approximately level full, carefully submerge it in quiet water, preferably resting it on the bottom of a shallow pool or tub with the top of the pan just below the water surface. After the material has become thoroughly wet, work over the contents with both hands and break up any lumps. If clay is present, knead and stir the material until the clay is dissolved and floated away. It is important that all clay be eliminated before actual panning begins. Wash off and throw out all large rocks. In this first step the eye and hands substitute for a screen.
Suspension and Stratification
Begin this stage by grasping the pan with hands on opposite sides and while holding the submerged pan level, twist it back and forth (clockwise and counterclockwise) with sufficient vigor to keep the contents loose. This allows the heavier minerals to migrate to the bottom of the pan and is similar to the action in a jig in which heavy mineral grains are separated from lighter grains by their ability to sink through a semi-fluid bed. If this second step is properly executed, the smallest and heaviest grains will migrate toward the bottom and the larger and lightest to the top. This will allow many of the pebble-size rocks to be manually removed by raking them out of the pan with the fingers.
Washing the Pan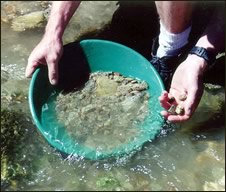
The third step is one which, depending on the nature of the material being washed, may take on many variations. It is like Step 2 in that the entire contents of the pan are kept in motion, but as stratification of the bed develops, the lighter particles are allowed to escape over the of the pan. To do this, raise the pan partially above water and move the hands slightly back of center (allowing the pan to tip forward with the low side away from the panner) and change from the twisting motion of Step 2 to a flat circular motion. While keeping the pan partially submerged and its contents loose, gradually work the lighter-weight material over the low side of the pan. The rate of discharge is regulated by raising or lowering the pan rim and by using a side to side motion along with the flat circular motion. Alternate Steps 2 and 3 and wash until the bed begins to pack or until heavy minerals begin to crowd to the surface.
Cleaning the Gold Pan
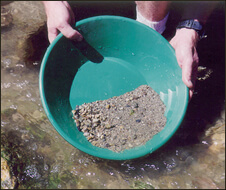 The fourth step involves selectively washing away surface grains and, in effect, it can be compared to the action of wash water on a concentrating table. To prepare the now partially concentrated material for this step, the pan is given a short, quick side to side motion of sufficient vigor to thoroughly loosen the bed and further stratify the material. During this shaking phase the pan is tipped gradually forward until the surface of the mineral bed becomes flush with the tip. At this point the shaking is stopped and the mineral bed allowed to settle. Next a thin layer of the lighter material is removed by carefully dipping and raising the pan with a forward-and-back motion which will wash off the surface grains a few at a time. The washing can be effectively controlled by use of a somewhat circular motion as well as the forward-and-back dipping motion. When the panner decides that further washing would cause a loss of values, the bed is re-stratified and more light material brought to the surface by repeating the vigorous side-to-side motion. Repeat the washing and shaking operations until the heavy- mineral concentrate is clean or until it is reduced to a volume small enough to permit inspection or removal of the gold. During the finishing steps the panner can save time by raking any remaining pebbles out of the pan with his fingers and flicking out smaller particles with his thumb. These and other tricks come with practice.
Inspect the Pan and Estimate Gold Recovered
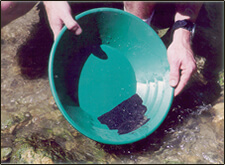 At the end of the panning operation the original material will normally have been reduced to a small quantity of concentrate consisting mostly of black sand minerals. After putting a little clear water in the pan, the experienced panner will fan out the concentrate on the bottom of the pan and by “tailing” the gold he can inspect or count the colors. At this point he can estimate the tenor of the sample. There are perhaps as many ways of tailing the gold as there are panners but this is usually accomplished by moving the pan in a way that causes the water to gently swirl around the trough formed at the intersection of the bottom and side of the pan. This swirl of water carries the lighter particles ahead of those which are heavier or finer and with careful manipulation, brings the gold colors into view at the tail of the slowly moving fan of concentrate.
Removing Gold from the Pan
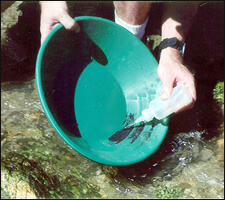 Final separation of the gold from other heavy minerals can be made in a number of ways. Larger pieces can be picked out with tweezers or the point of the knife and small colors or specks can be picked up by pressing down on them with the end of a wooden match or a dry finger tip. Remove the gold by placing the finger tip over a vial of water and washing it off with a splash of water.
A small globule of clean quicksilver (mercury), if rolled around in the pan, will pick up the gold providing it is untarnished and free of oil or grease. Tarnished gold can be brightened by rubbing it in the pan.
Where there is a considerable amount of black sand, particularly if it is fine and densely packed, it may be easier to separate the gold by blowing. This is done by first drying the concentrate and then removing the magnetite with a common horseshoe magnet, and finally, by blowing the non-magnetic black sand residue away from the gold. To do this, place the non-magnetic residue in a dry gold pan or on a suitable sheet of stiff paper and holding it level, blow gently across its surface while tapping the pan or paper. This takes some practice but with care a clean separation can be made in a surprisingly short time.
Tips & Tricks on How to Improve Gold Panning Technique
Panning for Gold with a New Pan
Getting the right gold panning kit is key to success. Be sure to check out our recently updated list of the very best that are available as of 2021. The film of grease or other rust preventative found on a new pan must be removed before use. This is best done by pacing the pan over a gas stove burner or other suitable flame until the metal turns blue. Although this process is sometimes called “burning“. care should be taken to avoid excessive heat. Blueing a pan not only frees it of grease but equally important, the resulting dark color makes fine specks of gold much easier to see in the pan. The “burning” process should be repeated as often as necessary to keep the pan free of body oil films which accumulate on a pan in normal use.
Pan factor
Gold pans are made in a variety of sizes but the size generally referred to as “standard” has a diameter of 16 inches at the top, 10 inches at the bottom and a depth of 2½ inches. A typical pan will hold 336 cubic inches or 0.0072 cubic yard. The number of pans representing a cubic yard of material in place (bank-measure) is called the pan factor. Pan factors vary according to the size and shape of the pan, the swell of the ground when excavated, and the amount of heaping when filling the pan. In practice, factors for a 16-inch pan range from 150 to 200 but an approximate figure of 180 is often used. This in based on a struck pan (i.e., level full) and an assumed 20 to 25 percent gravel swell.
Recommended pan size
The average panner should not use a 16-inch pan but instead should use the so called “half-size” pan which has a top diameter of 12 inches, a bottom diameter of 7½ inches and a depth of 2 inches. The half-size pan level-full weighs approximately 9 pounds compared to about 20 pounds for the standard 16-inch pan. Halving the sample weight by use of the smaller pan not only reduces fatigue, particularly when much panning is to be done, but the fact that it is much easier to carry in the field and to use in a small stream or tub is an important consideration. The pan factor for a 12 x 7½ x 2-inch pan is about 400, assuming a 20 to 25 percent gravel swell. Experience has shown that two half-size pans can usually be washed in less time than one full-size pan.
Use of perforated pan
Panning, at best, is a tedious, backbreaking job and anything done to speed the operation or improve working conditions will be repaid many times over in the form of more reliable results. The beginner and experienced panner alike can profit by use of a sieve made by drilling ¼-inch holes in the bottom of a pan of the same size and shape as the one used for panning. To use the sieve, place it inside of the regular pan and then fill with gravel and submerge in water in the usual way. When the material is thoroughly wetted, lift the sieve slightly and twist it back and forth (under water) until all minus ¼-inch material has passed into the regular pan. The plus ¼-inch material is discarded and the fines which dropped into the regular pan are washed in the usual way. Aside from speeding the overall panning operation, the use of a sieve enables the engineer to conveniently inspect the plus ¼-inch rocks and to estimate the proportion of coarse material.
Use of safety pan
Allowing the pan tailings to fall into a second pan generally referred to as a “safety” pan will guard against losing the sample by accident and will greatly expedite re-panning where this is called for.
Panning large samples
When a large multi-pan sample is to be washed, rather than complete each successive pan, it is best to reduce them only to a rough concentrate. The rough concentrates are accumulated and are eventually combined for finishing in the usual manner.
Stage panning
Where a large amount of heavy black sand is encountered, a stage-panning procedure can be used to advantage. This is done by panning and re-panning to successive high-grade concentrates without attempting to make a complete saving of black sand or values at any one stage. As the proportion of heavy minerals decreases with each successive repan, it becomes progressively easier to make a high-grade concentrate with a low-grade tailing. Usually two or three repannings will make an acceptably clean tailing.
Supplemental data
When panning a sample the experienced engineer will note a variety of things among which are: Its amenability to washing, particularly where clay or cementing materials are present; the proportion of coarse to fine material; any evidence of unusual muddy water problems; the composition and angularity of rocks; the relative ease of concentration; the quantity and composition of black sand; indications of valuable or potentially valuable accessory minerals; the size, shape and other physical characteristics of the gold including “rust”, tarnish or other factors which would affect its amalgamation. Any of the foregoing could be important factors in a placer mining operation.
Use as a geologic tool
Although the miners’ pan is normally associated with gold deposits, it can be profitably employed when investigating a variety of heavy minerals such as monazite, scheelite, magnetite, ilmenite, cassiterite, chromite, cinnabar, etc. In general, it should be borne in mind that with few exceptions the pan can be employed in the study of either lode or detrital-type deposits containing finely divided minerals of relatively high specific gravity. The use of a miners’ pan as a geologic tool has been studied and reported in detail by Mertie (1954) and by Theobald (1957).
Gold Pan
Panning is the hardest way to wash gold from placer gravels, but it is an inexpensive and completely mobile method. A person can dig with a pick and shovel much faster than he can pan the material dug, so it pays to treat only the highest grade products by panning once one has settled down to mining.
An experienced person can wash about 10 large pans per hour, the equivalent of approximately ½ to 1 cubic yard of gravel per day, depending on how clean the gravel is. A level-full, standard 16-inch pan might contain roughly 22 pounds of dry bank gravel; there are approximately 150 to 180 pans per cubic yard of gravel. More than twice as many 12-inch pans would be required per cubic yard. The top dirt or cover is usually cast aside and the few inches of material directly above bedrock and the material scraped from crevices is panned. Places to look and the proper panning technique have been covered in earlier sections.
Panning for Gold
The standard gold pan is made of stiff sheet iron and is 16 inches in diameter at the top and 2½ inches deep. The rim is flared outward at an angle of about 50 from the vertical. Smaller pans are used for testing, and it is advisable for most panners to use either a 10- or 12-inch size for handling ease. Probably the 12-inch is the most widely available. Frying pans or other cooking utensils may also be used for washing out gold but are less effective. Before any kind of container is used for panning it should be cleaned thoroughly and all grease should be burned out. New pans generally are greasy and should be heated over a fire until this coating is gone. Even a rusty pan, if clean, can be used satisfactorily. In fact, the roughness due to the pitting of the rust may assist in holding back the gold.
There are different techniques and subtle variations in the art of panning—experience teaches which is beat. Those with wide experience and much practice can recover the most gold with the least effort. It is sometimes said that good panning technique lies in the action of the wrists. After much practice the good panner should be able to save even the very fine gold that may be nearly but not quite free from the black sands.
The pan usually is filled level with the top, or slightly rounded, depending somewhat upon the nature of the material being washed and the personal preference of the panner. It is then submerged in water. Still water 6 inches to 1 foot deep is best. While under water the contents of the pan are kneaded with both hands until all clay is dispersed and the lumps of dirt are thoroughly broken. The stones and pebbles are picked out after the fines are washed off. Then the pan is held flat and shaken under water to permit the gold to settle to the bottom. The pan is then tilted and raised quickly still under water so that a swirling motion is imparted and some of the lighter top material is washed off. This operation is repeated, occasionally shaking the pan under water or with water in it until only the gold and heavy minerals are left. With proper manipulation, this material concentrates at the edge of the bottom of the pan. Care must be taken that none of the gold climbs to the lip of the pan or gets on top of the dirt.
Nuggets and coarse colors of gold can now be picked out readily with a tweezer or with the point of a knife. Cleaning the black sand from the finer gold is more difficult, but can be carried nearly or entirely to completion by careful swirling of the contents as described above, always watching to see that none of the colors are climbing toward the lip. This part of the operation usually is done over another pan or in a tub so that if any gold is lost it can be recovered by repanning.
The concentrates should be dried, and the black sands (composed largely of magnetite) can then be removed by a magnet or by gently blowing them on a smooth flat surface. If there is an excessive quantity of black sand, the gold usually is amalgamated by putting a portion of a teaspoonful of mercury in the pan. In sampling work, extra care should be taken to see that no fine colors are lost. When mining, however, additional time needed to insure that all colors are saved probably is not justified because the value they add is so small.
A word should be said here about other minerals that you may see in your gold pan. Pyrite (“fool’s gold,” an iron sulfide) and mica are often mistaken for gold by the novice. Pyrite, which is usually a brassy yellow to white color, will shatter when struck with a hammer and becomes a black powder when finely ground. Mica, which may have a bright, bronzy appearance, is distinguished by its light weight and flat, platy cleavage. Both minerals are common in gold areas. Other minerals that will collect with the gold and black sands because of high specific gravity include ilmenite (iron-titanium oxide), hematite (nonmagnetic iron oxide), marcasite (an iron sulfide), rutile (titanium oxide), scheelite (calcium tungstate), wolframite (iron, manganese tungstate), tourmaline (boron and aluminum silicate), zircon (zirconium silicate), chromite (Iron and chromium oxides), and cinnabar (mercury sulfide). If present in sufficient quantity, these latter minerals may have some economic significance, although efforts to recover them as byproducts are seldom worthwhile. Native platinum, elemental, mercury, lead shot, and similar materials are also occasionally found in the pan.
